The ultimate guide to Supabase Edge Functions

Introduction
In my previous post Getting Started with Supabase: A Comprehensive Guide for Developers, I covered several basic topics about this great BaaS platform to get you ready for a deep dive into it. So, if this is your first time over here I recommend to go and check it first 😎
What are Supabase Edge Functions & how do they work?
According to Supabase self-description:
Edge Functions are server-side Typescript functions, distributed globally at the edge — close to your users. They can be used for listening to webhooks or integrating your Supabase project with third parties.
So, first, they are Typescript functions by default, which means that you can use all the power of this language out of the box. The fact that they are closed to the users by distribution allows faster response times and reduced latency, as the function is executed closer to the user making the request. And finally, they can be integrated with third-parties libraries which allows extending, even more, the capabilities of what you can do.
Well, spare me the chit-chat, let’s dive in!

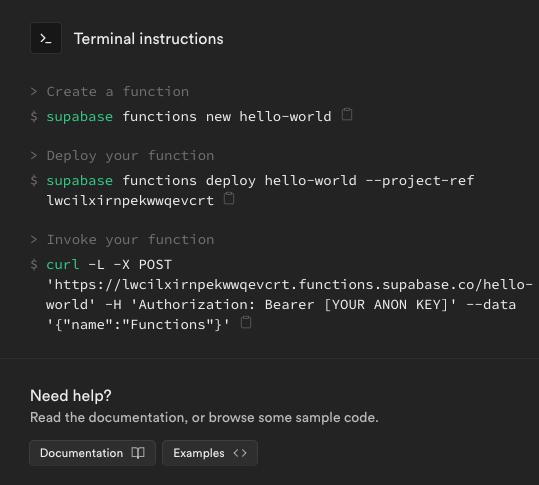
Back to our Supabase dashboard, we have to go to the left sidebar and click over the “Edge Functions” tab. In there, you’ll see instructions to create an example function called hello-world.
Setting up the environment
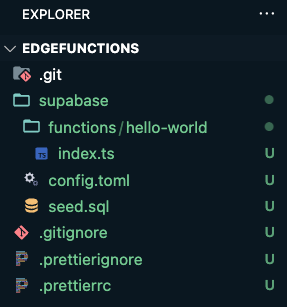
This is how my Supabase edge function project usually looks like:
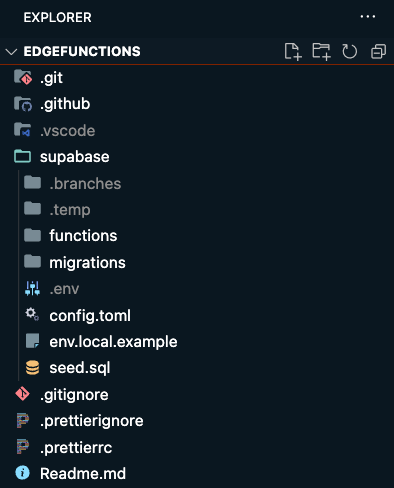
As you can see there are several files inside the project, don’t worry, will be covering each detail, first let's set that environment up!
- To create our project we need to install the Supabase CLI:
npm install supabase --save-dev
in my case, since I’m using MacOS, I’ll be installing it by using brew:
brew install supabase/tap/supabase
- Then, create a new project with the following command:
supabase init
This is gonna create the folder supabase within two files inside config.toml and seed.sql. Files written in Toml language, are easy-to-read configuration files and as you may be guessing the configuration file for your project. The other file is intended to have some seed data for every time you need to reset your database and be able to restore with some default data (we’ll be covering this in another article)
- Then, we’ll be setting Git in our project to have it versioned, run this command:
git init
I have a Git ignore file preconfigured that covers most of the use cases I have faced, feel free to copy and paste, and modify as per your requirements:
Also, I have a prettier file preconfigured for this function, so, you can copy and paste it:
and for the prettier ignore file, you can start with this simple one, after your project grows you may be adding files that you don’t want to be prettify ;)
Creating our first function
So, back to our console, let’s create our first function:
It is recommended to use hyphens to name your functions.
supabase functions new hello-world
The first time you run this command, it is going to create a folder called functions, and inside another folder with the name of the function and a file called index.ts. By convention, all function names are at the folder level and inside have an index.ts file.
If you follow the steps until here, this is how your project should look like this:
Now, let's see what’s inside the brand-new function…
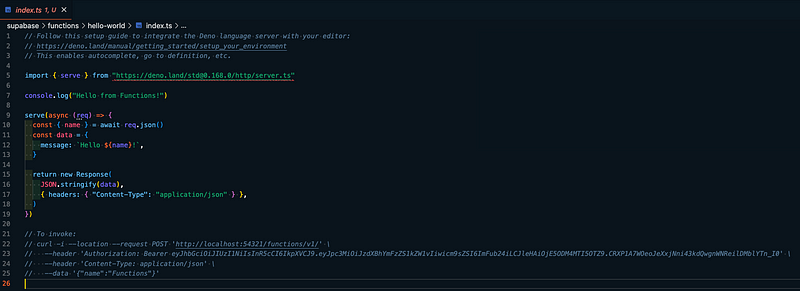
There are some things to note here:
✓ Supabase edge functions uses Deno runtime. This is convenient for Supabase functions architecture since Deno is a single binary executable with no external dependencies.
✓ The import is highlighting an error. To have a successful development environment, it is recommended to install the official VSCode Deno extension, it will allow you some configuration like caching new imports, which is the error that is marking the import right now.
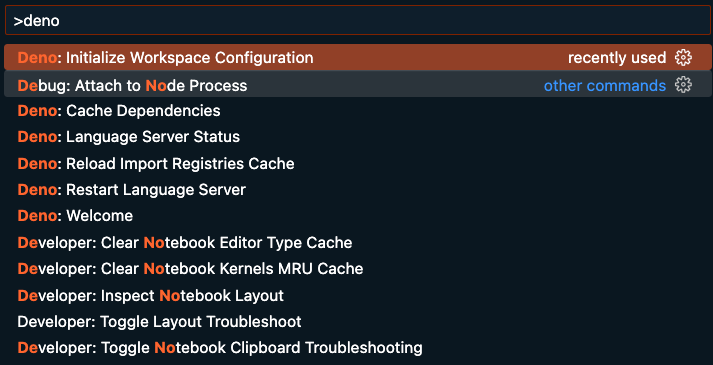
- So, after installing the extension, let's address this by initializing the Deno workspace. Press Ctrl+Shift+P for Windows or Cmd+Shift+P for MacOS, type deno and select the option Deno: Initialize Workspace Configuration.
- Then select yes in the subsequent two options. It will set the following configurations to .vscode settings:
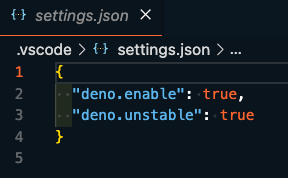
- Once this is done you’ll see no import error anymore.
✓ At the very end we have commented lines within an example of how to invoke our function with curl. This example has all the needed parameters to test your brand-new function. But before that, we need to deploy our function to Supabase cloud to make it accessible.
supabase functions deploy hello-world --project-ref lwcilxirnpekwwqevcrt
- From where do we get the project ID? Well, we could get it from our Supabase project URL:

- Once deployed, you’ll see it in the functions dashboard

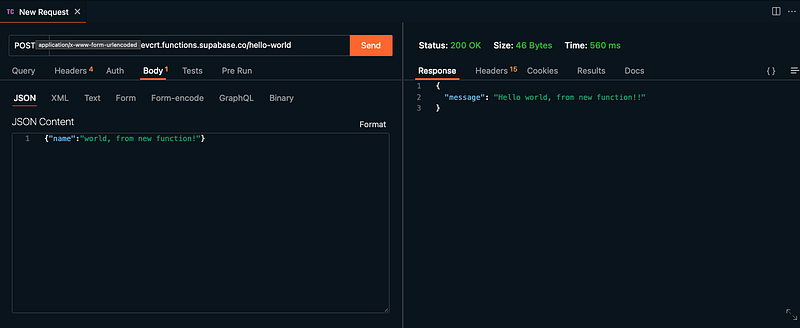
- If you click on the function you’ll get into all the details of it, and at the very end, there will be two little arrows pointing at each other, if you click them, that panel will expand and you’ll get all the info you need to test your function. Let’s try!
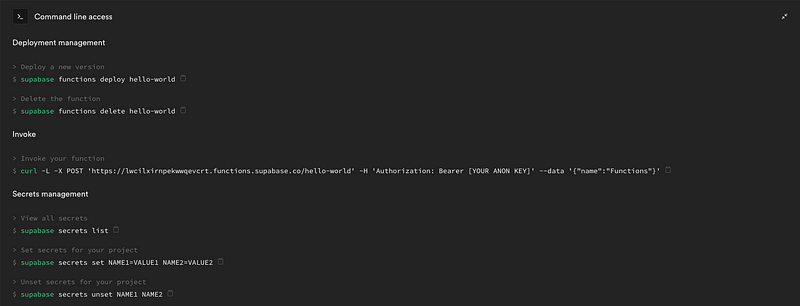
- For testing the function I’ll be using the Thunder Client extension from VSCode, but feel free to use anyone you prefer, like Postman, Insomnia, RapidAPI or whatever your want.
Wrapping up!
We have covered a complete road to set up a supabase edge function project from scratch. We addressed common errors you’ll find on the road to achieve this, and got over some cool VSCode extensions to improve our development time.
Next steps
From here, commit & push your changes to any repository of your preference.
Dive deep into the documentation for more advanced examples and understanding.
Stay tuned, I’ll be writing an article integrating Github Actions workflow for your functions 🔥
Bonus content
Repository with the created hello-world function on Github