Simplify Your Next.js and TurboRepo Setup: Easy-to-Follow Environment Configuration Guide

Introduction
In this article, we are gonna dive into an improved development experience with Next.js and TurboRepo by following our comprehensive and easy-to-understand environment setup guide. This detailed tutorial will walk you through each step of the configuration process, ensuring that you have a seamless and efficient development environment tailored to your needs. By the end of this guide, you'll be well-equipped to harness the full potential of Next.js and TurboRepo, ultimately enhancing your web development projects and workflow.
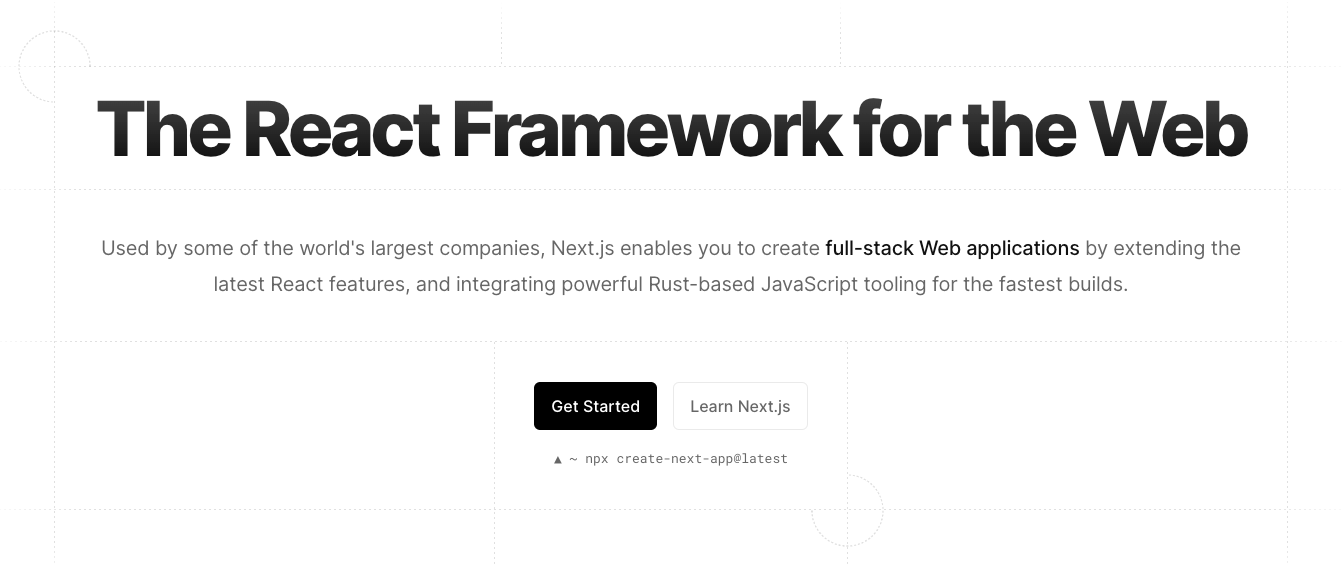
What is Next.js?
Next.js is a powerful, open-source React-based framework designed to streamline and simplify the development of server-rendered React applications. Developed by Vercel, this versatile tool offers numerous features such as automatic code-splitting, server-side rendering, static site generation, and API routes, all of which contribute to a more efficient and optimized web development process.
By leveraging the capabilities of Next.js, developers can create highly performant, scalable, and SEO-friendly web applications with ease. In conjunction with TurboRepo, a cutting-edge Monorepo management tool, you'll be able to further enhance your development workflow, ensuring that your projects are not only built faster but also more effectively. As you progress through this comprehensive tutorial, you'll gain a deeper understanding of how to configure and utilize both Next.js and TurboRepo to their fullest potential, ultimately elevating your web development projects and overall productivity.
What are Monorepos?
For those who may not be familiar with the concept of a Monorepo, I'll give a quick introduction to this powerful development strategy. Monorepos, short for "monolithic repositories," is a unique approach to organizing and managing codebases for multiple projects within a single repository. This method has gained significant traction in recent years, as it offers numerous benefits that can streamline and optimize your development process.
By consolidating all your projects into a single repository, Monorepos enables seamless collaboration among team members, as well as efficient code sharing and reuse. This centralized approach to code management fosters consistency across projects, simplifies dependency management, and reduces the overhead associated with maintaining multiple repositories. Additionally, Monorepos facilitate easier tracking of changes and updates, allowing for a more unified and transparent development experience.
Introducing Turborepo
In today's fast-paced software development landscape, efficient code management is crucial for maintaining consistency, simplifying dependency management, and reducing overhead associated with multiple repositories. Turborepo is an innovative solution that addresses these challenges by adopting a centralized approach to code management, known as Monorepos.
By consolidating all code into a single repository, Turborepo fosters a cohesive development environment that ensures consistency across various projects. This unified structure simplifies dependency management by eliminating the need to manage multiple repositories, thus reducing the time and effort required to maintain them.
One of the key advantages of Turborepo is its ability to facilitate easier tracking of changes and updates. With all code housed in a single repository, developers can effortlessly monitor modifications and identify potential issues, leading to a more transparent and efficient development experience.
In summary, Turborepo is a comprehensive solution designed to optimize code management by leveraging the power of Monorepos. Its centralized approach promotes consistency across projects, simplifies dependency management, and reduces the overhead associated with maintaining multiple repositories. Furthermore, Turborepo's enhanced tracking capabilities provide a more unified and transparent development experience, enabling teams to collaborate more effectively and deliver high-quality software.
Installation
Turborepo can be installed in two simple ways:
Installing from scratch
Adding to an existing project
In this article we are gonna focus on the first option, so let's get started!
In this guide, I'll be using pnpm package manager, but feel free to use whatever suits you.
# installing turborepo global
pnpm install turbo --global

# create a new project with their create-turbo npm package
pnpm dlx create-turbo@latest
A couple of things to note here:
you don't have to install it globally, it is just a recommendation for this guide
pnpm dlxfetches a package from the registry without installing it as a dependency, it is the equivalent to usenpx
As a result of the latest command you're gonna get a log like this one:
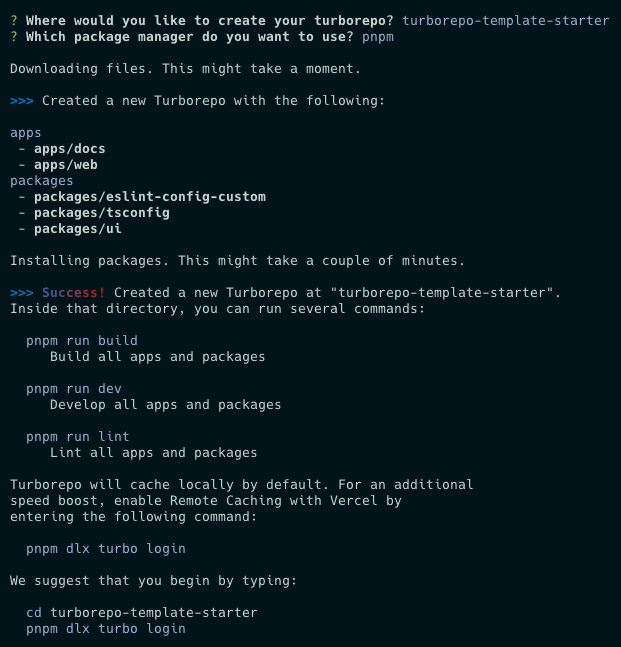
First, it will ask to name your new project, then which package manager will you prefer to use, I selected pnpm as I stated before.
Once you open it in VSCode (take into account I always recommend this code editor, but is just a personal preference, you are free to use the one you like most) this is how our project structure would look like:
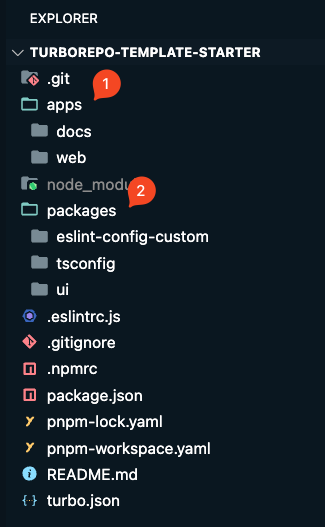
In our project structure, I marked two folders:
appsthis is where all your apps/projects will livepackagesthis is where all your shared projects, libraries & configurations will live
# default created apps
 - apps/docs: Next.js with TypeScript
 - apps/web: Next.js with TypeScript

# default created shared library & configurations
 - packages/eslint-config-custom: Shared configuration (ESLint)
 - packages/tsconfig: Shared TypeScript `tsconfig.json`
 - packages/ui: Shared React component library
To begin with, let's examine the two primary applications that have been created:
apps/docs: This application is built using Next.js with TypeScript, which provides a robust framework for server-rendered React applications, ensuring optimal performance and enhanced developer experience.apps/web: Similarly, this application also utilizes Next.js with TypeScript, offering the same benefits as the apps/docs application.
Now, let's explore the shared libraries and configurations that have been established to streamline the development process and maintain consistency across the applications:
packages/eslint-config-custom: This package contains a shared configuration for ESLint, a popular linting tool for JavaScript and TypeScript code. By centralizing the configuration, it ensures that all applications adhere to the same coding standards and best practices.packages/tsconfig: This package houses the shared TypeScript `tsconfig.json` file, which is responsible for managing the TypeScript compiler options and settings. By sharing this configuration, it guarantees that all TypeScript code within the Monorepo is compiled consistently and efficiently.packages/ui: This package serves as a shared React component library, which allows for the reuse of common UI elements across the different applications. This not only promotes consistency in design but also reduces the need for duplicative code, thus streamlining the development process.
Diving deeper into the configuration
In this section, we are going to dive into some of the most relevant configuration files.
If we browse to any of the package.json of our apps we'll find that they import the packages/* library & configuration files this way:
...
"dependencies": {
  ...
  "ui": "workspace:*"
},
"devDependencies": {
  ...
  "eslint-config-custom": "workspace:*",
  "tsconfig": "workspace:*",
  ...
}
This workspace:* means that look for this library/configuration file in the shared folder, and not in the package registry. This method is incredibly useful. To put it simply, you can create a private npm registry on your localhost.
Now, how this works, if you go to packages/ui/package.json you'll find these two attributes: "main" and "types", they tell from where this library it's been imported and where the typescript definitions are located respectively.
{
  "name": "ui",
  "version": "0.0.0",
  "main": "./index.tsx",
  "types": "./index.tsx",
  ...
}
That way if we, for example, go to the apps/web/pages/index.tsx we'll see the library is imported literally as we installed it from npm. You can also change the name to it, for instance:
{
- "name": "ui",
+ "name": "mylibrary/ui",
  "version": "0.0.0",
  "main": "./index.tsx",
  "types": "./index.tsx",
  ...
}
you have to import it into the package.json of all projects you import this library:
{
  ...
  "dependencies": {
    ...
-   "ui": "workspace:*"
+   "mylibrary/ui": "workspace:*"
},
and now, it can be imported into your components like so:
// apps/web/pages/index.tsx
import { Button } from "mylibrary/ui";

export default function Web() {
  return (
    <div>
      <h1>Web</h1>
      <Button />
    </div>
  );
}
Comprehending Configuration Files
Now, let's examine the shared configuration files:
eslint-config-customallows us to centralize all our ESLint settings, theeslint-config-customfile can be exported and used wherever necessary. The convention for naming these files iseslint-config-*, so the name you assign will be the one you import into your project settings, for instance:eslint-config-additional
// apps/web/.eslintrc.js
module.exports = {
  root: true,
  extends: ["additional"],
};
tsconfigfor this case, the process is quite similar but with a few variations. In the example below, we are importing a specializednextjs.jsonconfiguration file that inherits from a base one and is configured for this framework. For other projects, you should create, if necessary, another configuration file that adjusts to their requirements.
// apps/web/tsconfig.json
{
  "extends": "tsconfig/nextjs.json",
  "include": ["next-env.d.ts", "**/*.ts", "**/*.tsx"],
  "exclude": ["node_modules"]
}
turbo.jsonthis file is located at the root of our Monorepo and serves as the entry point where all the magic occurs.
I'll be covering a deeper article with more advanced configurations.
// ./turbo.json
{
  "$schema": "https://turbo.build/schema.json",
  "globalDependencies": ["**/.env.*local"],
  "pipeline": {
    "build": {
      "outputs": [".next/**", "!.next/cache/**"]
    },
    "lint": {},
    "dev": {
      "cache": false,
      "persistent": true
    }
  }
}
For now, what it is important to understand is that every child of the pipeline (build, lint, dev, etc) are scripts that you should have across your projects (package.json) inside the apps folder.
Now, let's start with the magic! In your terminal run this command:
turbo lint
will run the configured linter across all your projects and will output a log like this:
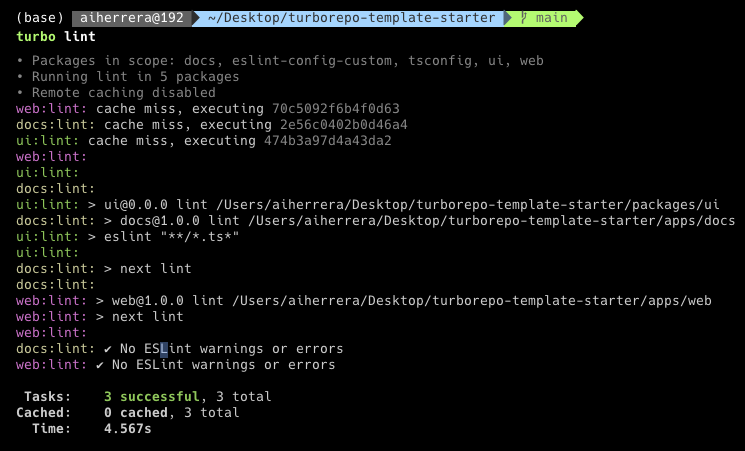
If you pay close attention, you'll notice that each project is marked with a different color and they don't run in order. What's happening here is that Turborepo runs each project concurrently, which is how they speed up their processes! In this case, the scripts within the pipeline have no dependencies. If they did, they would need to wait for those dependencies to finish executing before beginning.
Another thing to note is that in the first line of executions of the projects, it says cache miss. Turborepo has a built-in cache system for every execution of your scripts! Let's execute the same
lintcommand again.
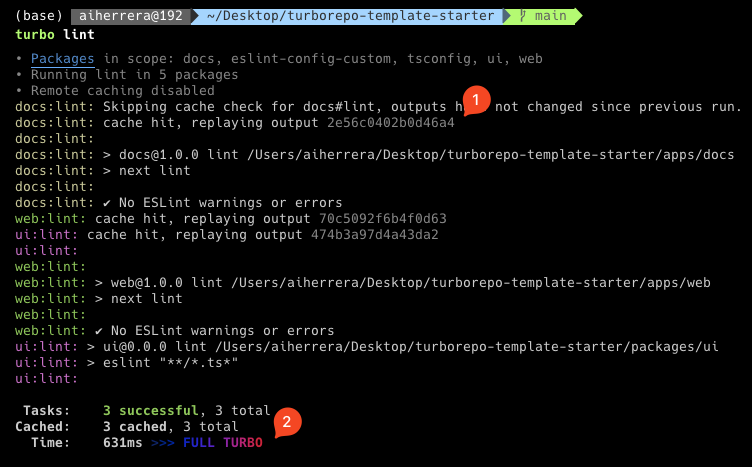
Now there will be a cache hit response with a replaying output + code
At the very end a \>>> FULL TURBO output
This means that Turborepo detected that there weren't changes from the last execution and it could be loaded from the cache system instead of running the script process again!
Running development
The final step is to initiate our development environment. To do this, let's execute the following command:
turbo dev

#if you want to run only a specific project you can use --filter flag
turbo dev --filter=web
Final thoughts
That's it! I hope you enjoyed this guide and have learned the basics of the incredibly useful world of Monorepos. By now, you should be able to:
Create a Monorepo from scratch using Turborepo technology
Understand how its cache system works
Understand how the shared configuration files work
- Run development environment for all projects and a specific one
Bonus
The generated projects are based on Next.js previous file structure (pages) but you can easily change it to the new one (app), and it will continue working the same.
I already have a fully-fledged, configured template with several add-ons in this link:
TypeScript for static type checking
ESLint for code linting
Prettier for code formatting
Pretty-quick runs prettier over changed files
For git integration, it has also:
Conventional commits for improving commits
Husky for improving commits
Thank you for reading! Any constructive feedback is greatly appreciated!