Introduction
Vite, a modern front-end build tool, has been gaining popularity due to its fast and lean development experience. Paired with Vitest, a testing framework designed specifically for Vite, you can create a robust testing environment for your applications. In this blog post, we'll explore how to master Vite application testing with Vitest, complete with tips, tricks, and examples.
What is Vite and Vitest?
Vite (French for "fast") is a next-generation front-end build tool created by Evan You, the creator of Vue.js. It offers a faster and leaner development experience for modern web projects.
Vitest, on the other hand, is a testing framework designed specifically for Vite. It provides a fast, scalable, and easy-to-use testing solution for Vite applications.
Setting Up Your Vite Project
Before we dive into testing, let's set up a simple Vite project. Here's how you can create a new Vite project using the command line:
pnpm create vite
This command will provide some quick questions to generate a new project. This is the configuration I selected for the project:

💡
Pro tip: I use
pnpm as my package manager. It is way more performant than the classic
npm. Since there could be different opinions between developer preferences, I'll just let a
comparison table within the features of each package manager - pick the one you like the most 😜
Installing and Configuring Vitest
To install Vitest, run the following command in your project directory:
pnpm add -D vitest
Next, add these two vitest scripts to your package.json:
"scripts": {
  ...
  "test": "vitest",
  "coverage": "vitest run --coverage"
}
Now, you can run your tests using pnpm run test.
Since Vitest is a unit testing framework for Vite, as you might have guessed by now, it integrates seamlessly with it. As stated on their website, Vitest can:
Reuse Vite's config, transformers, resolvers, and plugins - consistent across your app and tests.
In other words, this is all we need to begin creating Unit Tests for our project.
However, why stop here? Let's enhance our current toolkit with another fantastic tool!
For creating our tests, we will integrate Testing Library, a very handy set of utilities that, as they state:
The Testing Library family of libraries is a very light-weight solution for testing without all the implementation details. The main utilities it provides involve querying for nodes similarly to how users would find them. In this way, testing-library helps ensure your tests give you confidence in your UI code.
So, let's install it:
pnpm add -D jsdom @testing-library/react
as you can see we are also installing jsdom:
To effectively test React components, it is essential to replicate the DOM functionality in the test environment. JSDom aids in establishing this environment for testing, making it necessary to install it as a development dependency alongside the testing library, which provides utilities for querying nodes similarly to user interactions, ensuring confidence in your UI code.
Writing Your First Test
Let's write a simple component for greeting a user:
import PropTypes from 'prop-types'
export function Greeting({ name }) {
return <h1>Hello, {name}!</h1>
}
Greeting.propTypes = {
name: PropTypes.string.isRequired,
}
Here's how you can write a test for this component using Vitest & Testing Library:
import { describe, it, expect } from 'vitest'
import { render, screen } from '@testing-library/react'
import { Greeting } from './greeting'
describe('<Greeting />', () => {
it('greets the user', () => {
render(<Greeting name="John" />)
expect(screen.getByText(/John/i)).toBeDefined()
})
})
So, let's explain what's going on here:
you can think of describe as a wrapper for your tests, it creates a context for whatever it's happening inside.
it is an alias for test and it contains the expectation for what you are testing. It is composed of the name of the test and a function.
render it's a function from Testing Library that allows rendering a React component - in this case, we passed a hard-coded name "John"
expect it is used to create assertions - like to check if there is a text with the word "John" painted on the screen
💡
Pro tip: Note that the test file extension ends in jsx This is because we are rendering a JSX component under the hood by using the render function from Testing Library
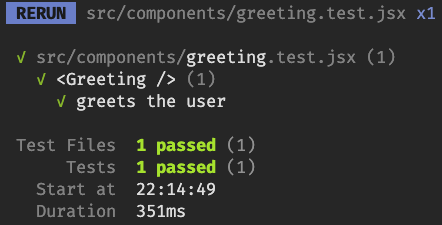
Now, you can run this test using pnpm run test. If everything is set up correctly, you should see a passing test in your console.
💡
Pro tip: Vitest by default is executed in watch mode, meaning that if you only want to run your tests once, you need to run them like vitest run
Let's then update our scripts in the package.json file:
...
"scripts": {
    "dev": "vite",
    "build": "vite build",
    "lint": "eslint src --ext js,jsx --report-unused-disable-directives --max-warnings 0",
    "preview": "vite preview",
    "test": "vitest run",
    "test:dev": "vitest",
    "coverage": "vitest run --coverage"
},
...
Now, we have a script for just one run and another for a testing developing experience.
Checking coverage
If you saw in the scripts there is a third one called coverage, this is another great utility that provides Vitest that we are gonna be covering here. Nevertheless, right now since they have migrated from the c8 to v8 coverage library, once you run the script pnpm run coverage you'll get this message in the terminal:

Simply respond with "yes" and the switch will be made automatically for you. Afterward, run the script once more and you'll receive the report.
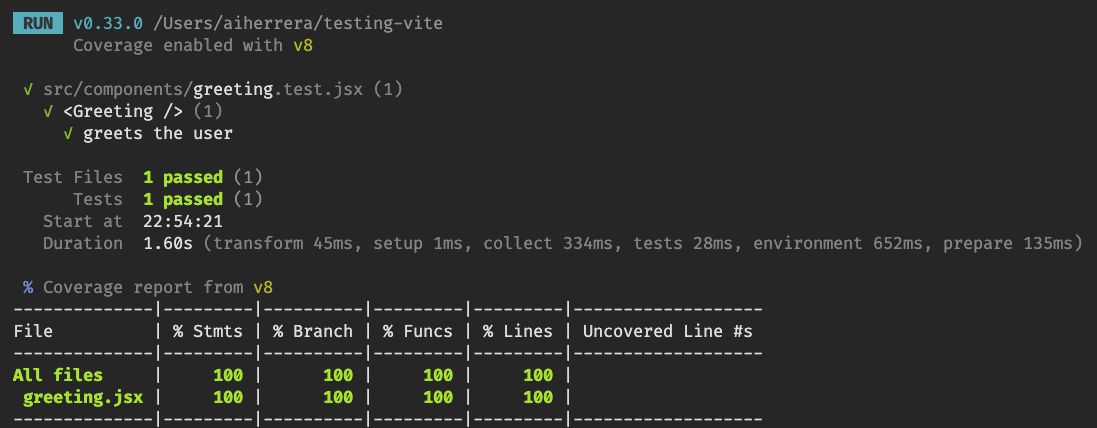
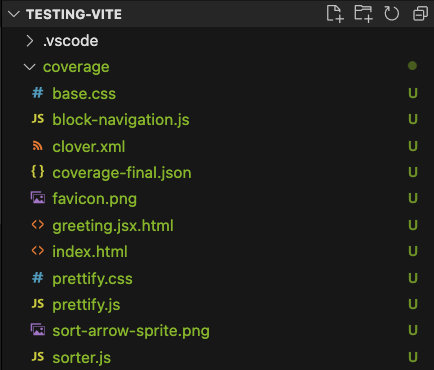
This will generate a folder with a UI that you can open in the browser.

Vitest UI
Another amazing tool I want to share is the Vitest UI library, which allows you to view and interact with your tests. This is completely optional, and as you'll see, it needs to be installed separately, but trust me, it's worth it.
npm i -D @vitest/ui
Now, let's update again our package.json file and add "test:ui": "vitest --ui"
...
  "test": "vitest run",
  "test:dev": "vitest",
  "test:ui": "vitest --ui",
  "coverage": "vitest run --coverage"
},
...
that's it, if you run it, you'll get this:
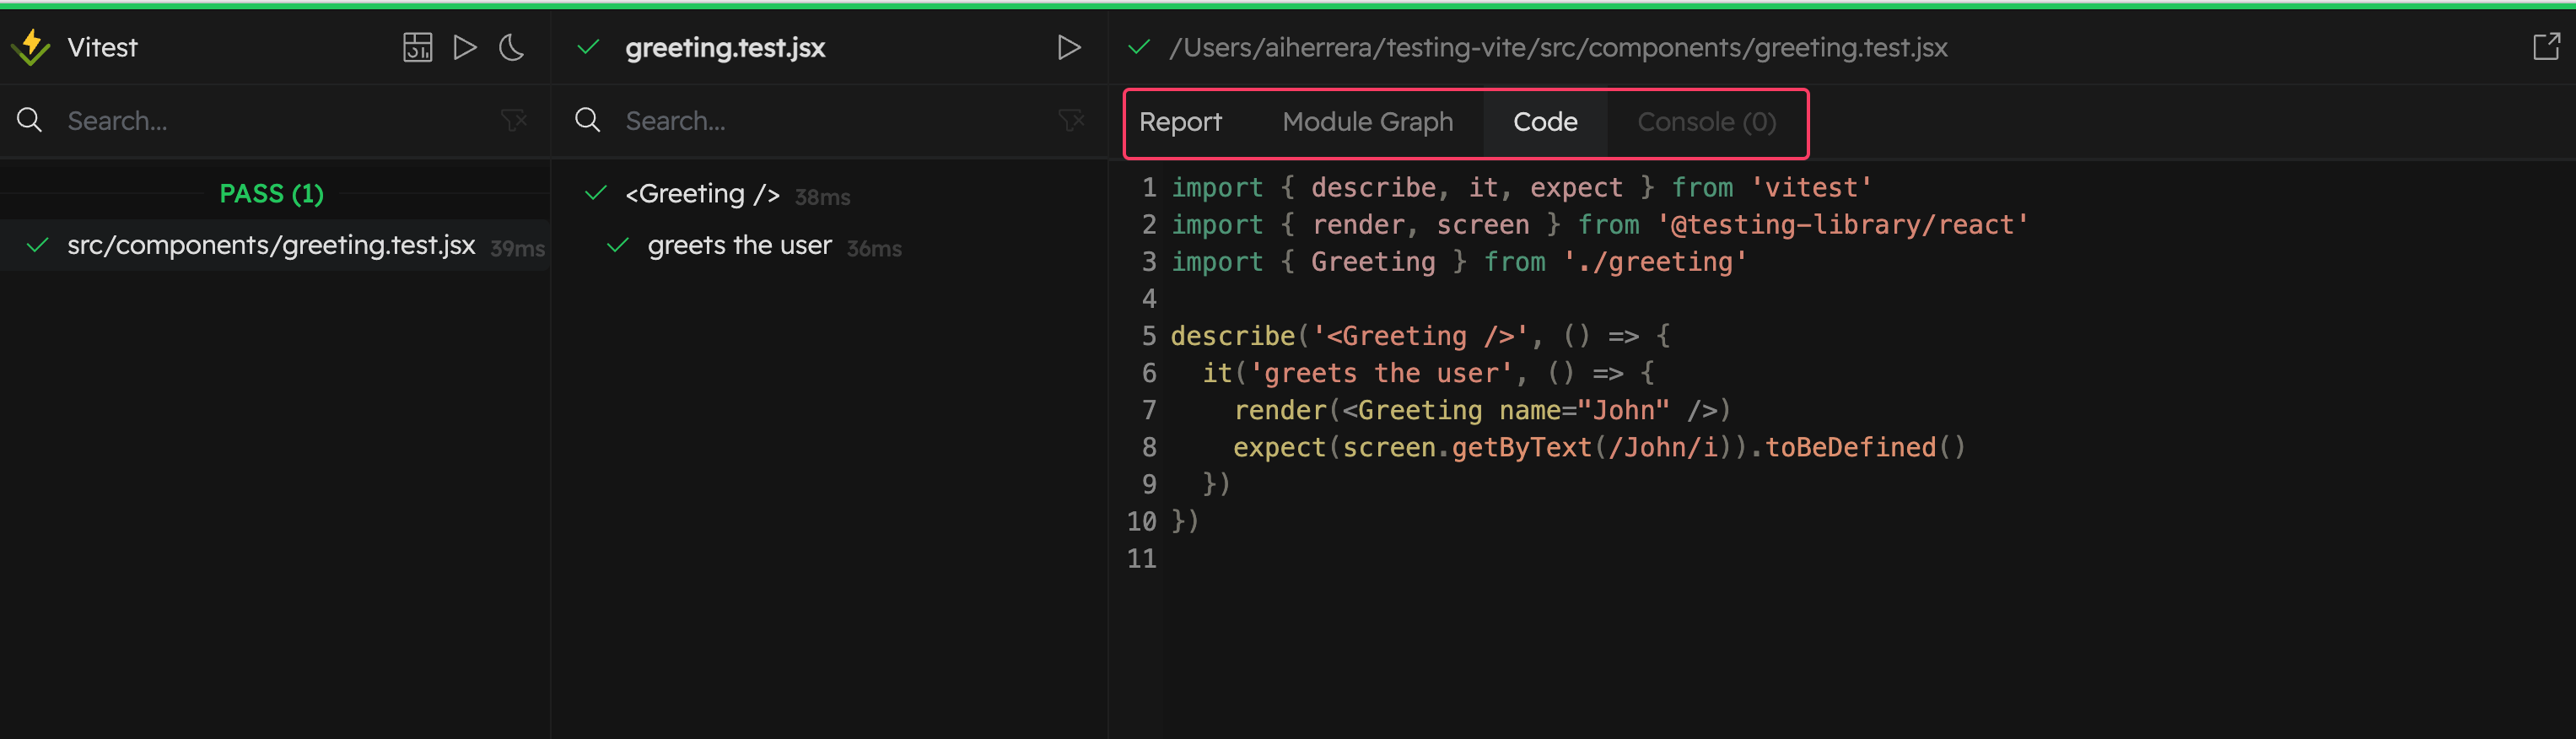
a complete playground that provides you with:
Tips and Tricks
Here are some tips and tricks for mastering Vitest:
Use Descriptive Test Names: Descriptive test names can make it easier to understand what a test is doing and why it might be failing.
Group Related Tests: You can group related tests using describe blocks. This can make your tests easier to read and manage.
Take Advantage of Vitest's Features: Vitest comes with several features designed to make testing easier, such as parallel test execution and automatic retries for flaky tests. Be sure to take advantage of these features.
Keep Your Tests Small and Focused: Each test should focus on a single piece of functionality. Smaller, more focused tests are easier to understand and debug.
Use Mocks and Stubs Sparingly: While mocks and stubs can be useful, they can also make your tests more complex and harder to maintain. Use them sparingly and only when necessary.
Bonus
As usual, I’ll let you with the fully configured Github repository with the example used in this article for you to check & try out.
I plan to add more examples over time!🧑💻
Last Thoughts
In conclusion, Vite and Vitest offer a powerful combination for developing and testing modern web applications. With the right knowledge and techniques, you can create robust, reliable tests for your Vite applications. Happy testing!
Hope you enjoyed this article, if so, consider giving it a like 👍🏻 and Stay Awesome!