Building My Own Visual Studio Code Extension Bundle
and Examining My settings.json Setup

Introduction
Recently we were struggling at work with newcomers joining our team and setting out each fresh equipment with all the required development environment. And from all the things we are trying to automate, I thought it would be nice to streamline the process of installing all the required & recommended VSCode (which is the code editor we use - most of us I think 🙊) extensions for the project.
So, I create this VSCode extension pack for three reasons:
Learn the whole process of how to create a VSCode extension throughout the Azure DevOps portal to Marketplace
Have a handy set of extensions for any new computer I have to grab and prepare the workspace from scratch
Sharing. Yes! - sharing with the community 👥
This article shares my experience creating a VSCode extension pack. I'll be showing you step-by-step the details of my journey. Also, I'll be sharing how I have configured my settings.json file and why.
Setting the Stage
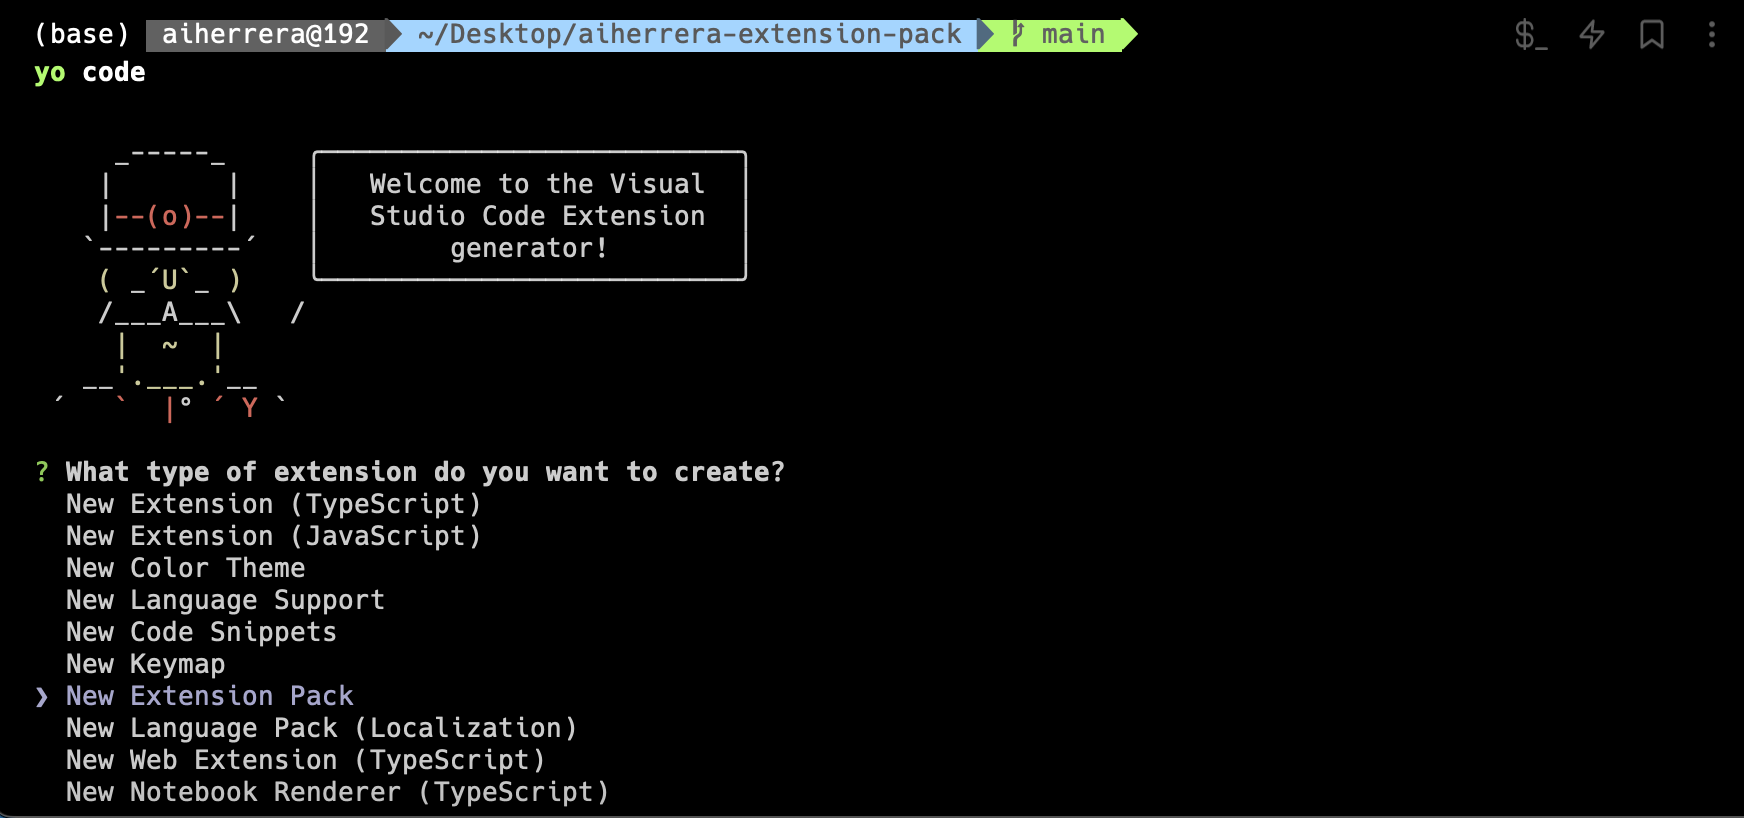
The first thing to create, to build an extension, is a project. Well, there is a tool that have us covered with a boilerplate to not start from zero: Yeoman.
As they state on their website:
Yeoman is a generic scaffolding system allowing the creation of any kind of app. It allows for rapidly getting started on new projects and streamlines the maintenance of existing projects.
This is an amazing tool that I'll be covering in a later post(to show how to scaffold & ship your own CLI), but getting back to our journey, the Microsoft team built an npm package (a project generator using Yeoman) that helps the process a lot.
So, the first step is gonna install these two packages globally with this command:
npm install -g yo generator-code
After that, you are ready to go. Run `yo code` as shown in the image below and you'll see a bunch of possible options, select: New Extension Pack
The CLI is gonna ask some questions, just fill out them accordingly:

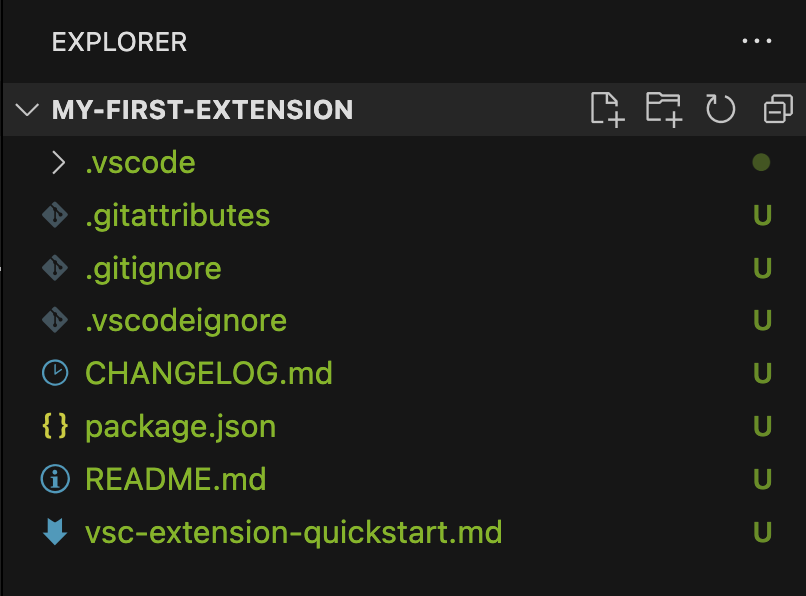
That's it! You'll get a folder structure like this one:
Building the Extension Bundle
Now it is time to start creating the extension bundle. If you selected yes to the question of pulling the currently installed extension in the VSCode editor, you have 50% of the work done, the rest is configuration. Let's dive in.
If you open your package.json file it would look like this:
{
  "name": "my-first-extension",
  "displayName": "my-first-extension",
  "description": "This is my first extension",
  "version": "0.0.1",
  "engines": {
    "vscode": "^1.79.0"
  },
  "categories": [
    "Extension Packs"
  ],
  "extensionPack": [
    "adpyke.codesnap",
    "bradlc.vscode-tailwindcss",
    "ChakrounAnas.turbo-console-log",
    "christian-kohler.npm-intellisense",
    "christian-kohler.path-intellisense",
    "dbaeumer.vscode-eslint",
....
}
Let's break this down:
The first properties: name, displayName, description and version, are related to the extension you want to create.
The engine's property is related to what versions of VSCode can support your extension.
The categories list where your extension would be available in the Marketplace.
And the extensionPack is where the currently installed extensions are pre-populated.
code --list-extensions and, to filter them if you have a profile set: code --profile Frontend --list-extensionsAfter this, I added some other configurations to my package.json
preview: this is set to false because my extension isn't in preview mode, it is ready to use. If you are developing a new extension this may be useful to tell the users this is in development and can be unstable.
publisher: the name you are gonna use to author your extension
icon: the image it is gonna appear in the Marketplace (it has to be 128x128px or 256x256px for retina display)
repository: well this has to be more with the repository where I host the project, this case Github.
{
  "name": "my-first-extension",
  "displayName": "my-first-extension",
  "description": "This is my first extension",
- "version": "0.0.1",
+ "version": "1.0.0",
+ "preview": false,
+ "publisher": "aiherrera",
+ "icon": "icon.png",
+ "repository": {
+   "type": "git",
+   "url": "https://github.com/aiherrera/vscode-extension-package.git"
+ },
  "engines": {
    "vscode": "^1.79.0"
  },
  "categories": [
    "Extension Packs"
  ],
  "extensionPack": [
    "adpyke.codesnap",
    "bradlc.vscode-tailwindcss",
    "ChakrounAnas.turbo-console-log",
    "christian-kohler.npm-intellisense",
    "christian-kohler.path-intellisense",
    "dbaeumer.vscode-eslint",
....
}
To finish this section let's concentrate on the repository part.
So, let's do it!
npm i -g cgx
With that in place now you just call it in any terminal, here are some screenshots about the steps:
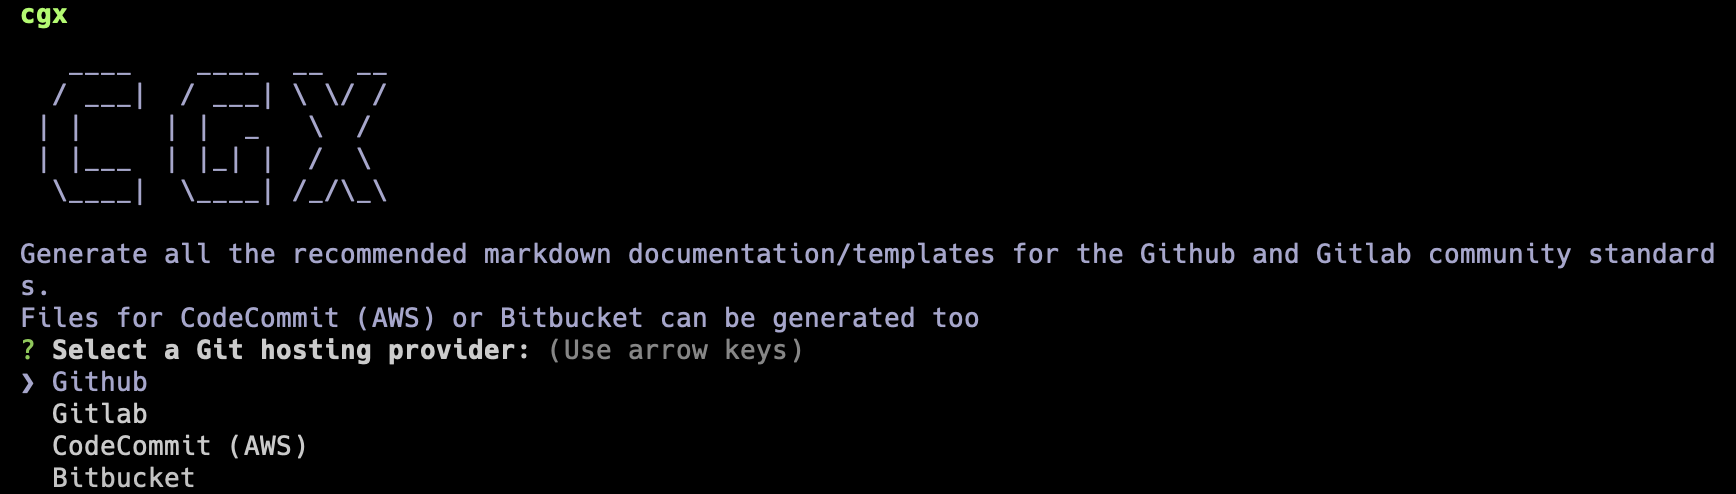

What I did here was to first generate all the recommended files and after that add the ones that I thought I would match with my interests.
Note here that most of the generated files won't need any modification, but others may need some refinement, yet most of the work is already done. I loved this repository, so if you do, starred it, to give support to community members.
Creating an Azure DevOps Organization
The next step to get to publish your extension is to create an Azure DevOps Organization, which is a streamlined process.
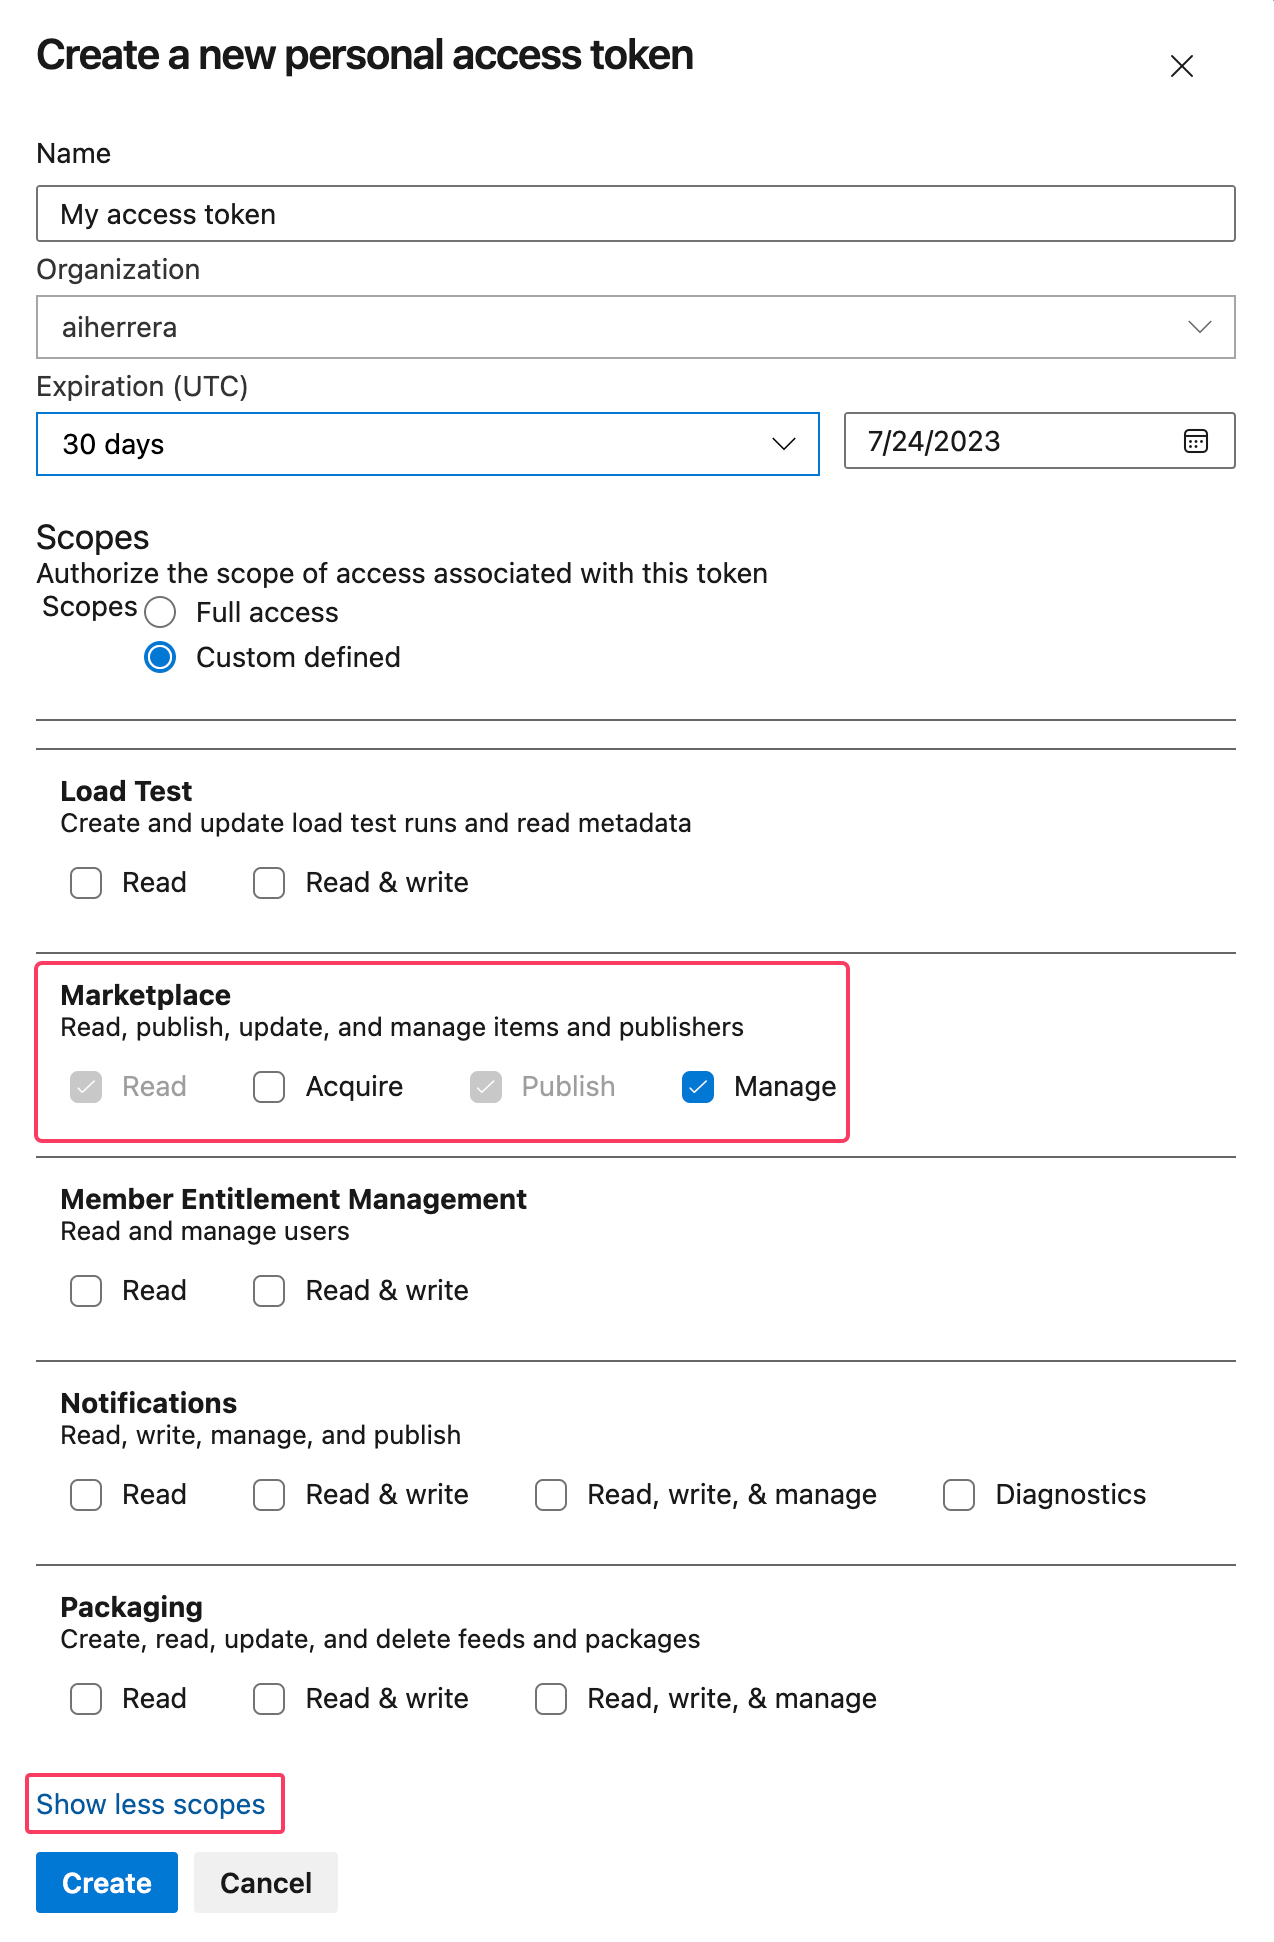
Once you have created your organization, you need to set up a Personal Access Token:

Here are the instructions:
Create a meaningful name for your token
Select the name of the just-created organization
Add an expiration time
At the bottom of the scopes click on Show more scopes, it would expand all the possible scopes, scroll down until you find Marketplace and select Manage
Click Create
The last step is to create a publisher, this is an identity that allows you to publish extensions in the Visual Studio Code Marketplace.
Publishing the extension package
Now we are ready to publish our Extension Pack. For this, we are gonna log in using our publisher name:
# publisher name
npx @vscode/vsce login aiherrera
# copy/paste the Personal Access Token you created at the begining
https://marketplace.visualstudio.com/manage/publishers/
Personal Access Token for publisher 'aiherrera': **********************
# if everything is ok, your are gonna get a succeeded message
The Personal Access Token verification succeeded for the publisher 'aiherrera'.
Once we are logged in, we are ready to create or first publication of our Extension Pack:
npx @vscode/vsce publish
 INFO  Publishing 'aiherrera.my-first-extension v1.0.0'...
 INFO  Extension URL (might take a few minutes): https://marketplace.visualstudio.com/items?itemName=aiherrera.my-first-extension
 INFO  Hub URL: https://marketplace.visualstudio.com/manage/publishers/aiherrera/extensions/my-first-extension/hub
 DONE  Published aiherrera.my-first-extension v1.0.0.
✨ Congrats, you have published your first extension ✨
package.json let's say we just publish v1.0.0, and you add a new extension to the package, update the version to v1.0.1 and good to go.Exploring settings.json
After creating the extension, I looked into my VSCode settings: the settings.json file. This file helps customize the editor in many ways. I checked the default settings and compared them to what I needed. Then, I changed important settings like indentation, theme, font, and code formatting to make it look and work how I wanted.
I created a Github gist with the configurations I use in most of my projects.
Take into account that certain configurations depend expressly on some extensions that live in the Extension Pack I created.
Final thoughts
I learned how to create my own Visual Studio Code extension pack from generating the project to publishing the extension in the Marketplace
On the journey, I learned some nice tools that I will use, for sure, in other projects
This will help my newcomer teammates to streamline the process of setting up their environments
Hope you enjoyed this article, if so, consider giving it a like and a star the project on Github.
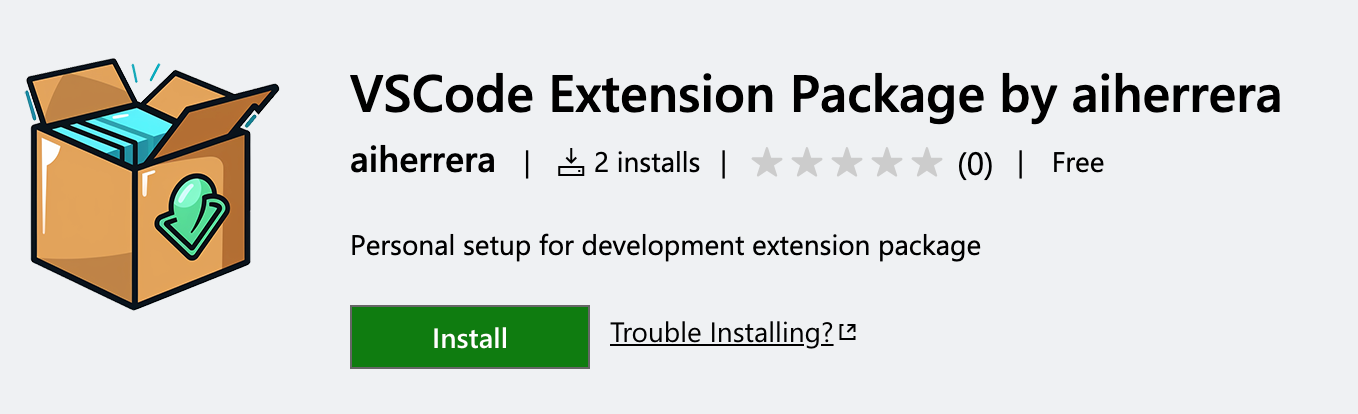
Here is the created extension on the VSCode Marketplace.
Stay tunned & happy coding!